The RTL-SDR software defined radio can be used to analyze cellular phone GSM signals, using Linux based tools Airprobe and Wireshark. This tutorial shows how I set up these tools for use with the RTL-SDR.
Example – Analysing GSM with RTL-SDR Software Defined Radio
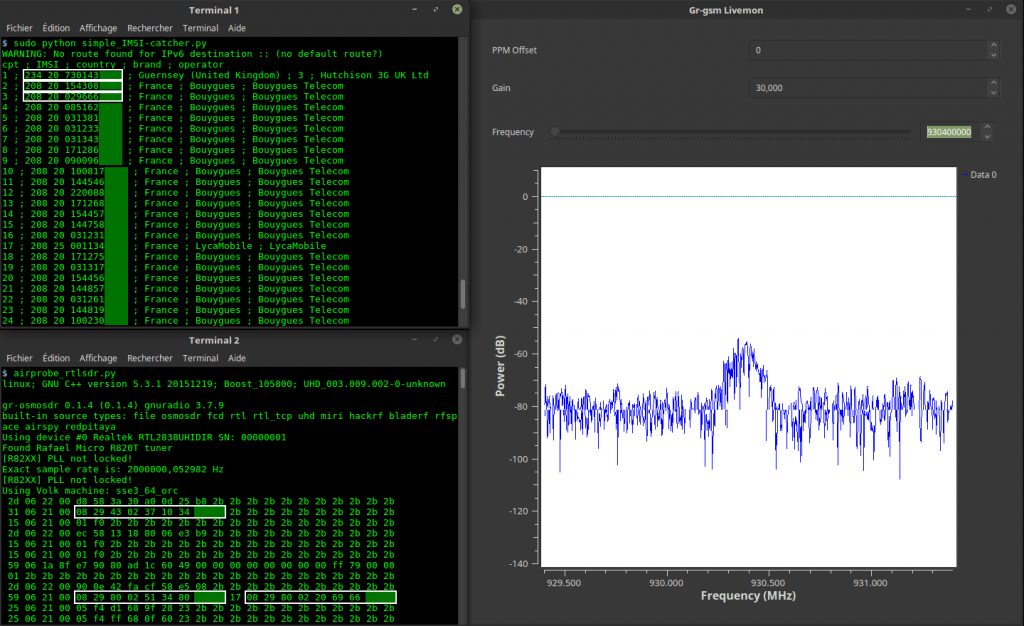
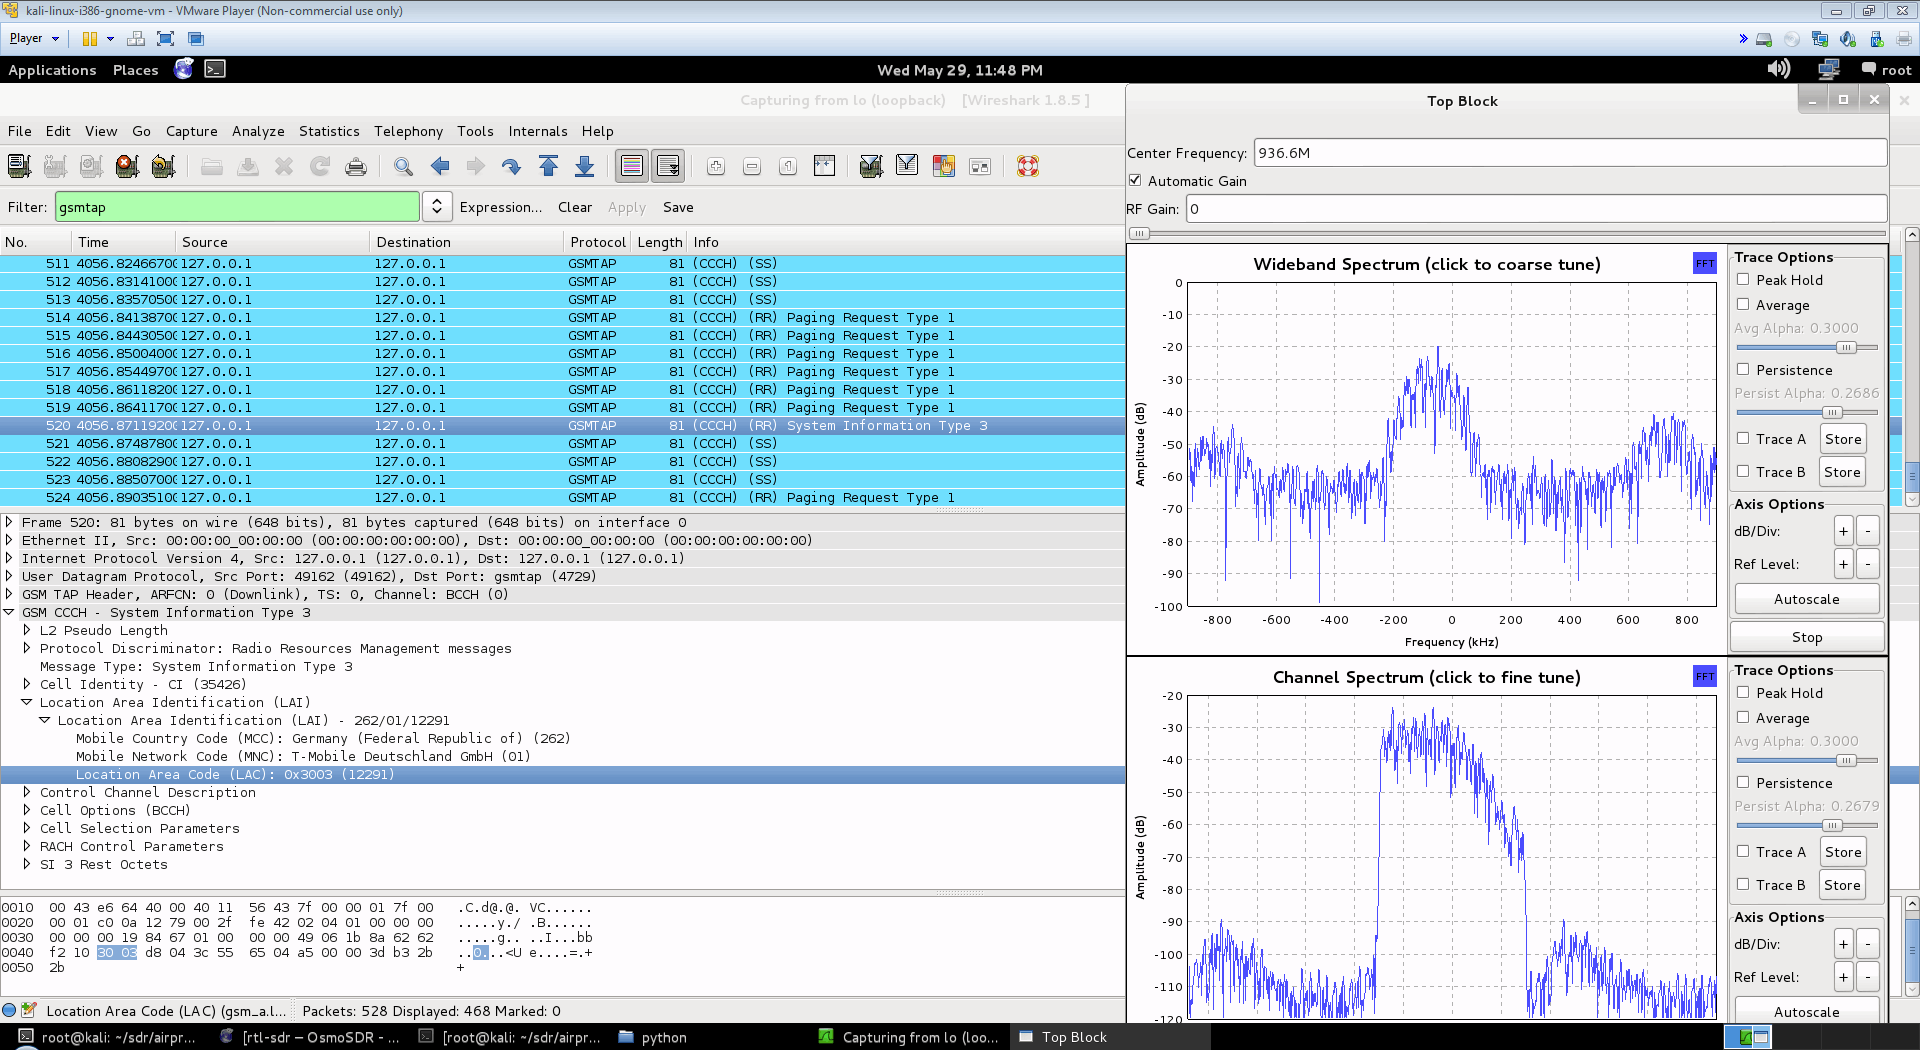
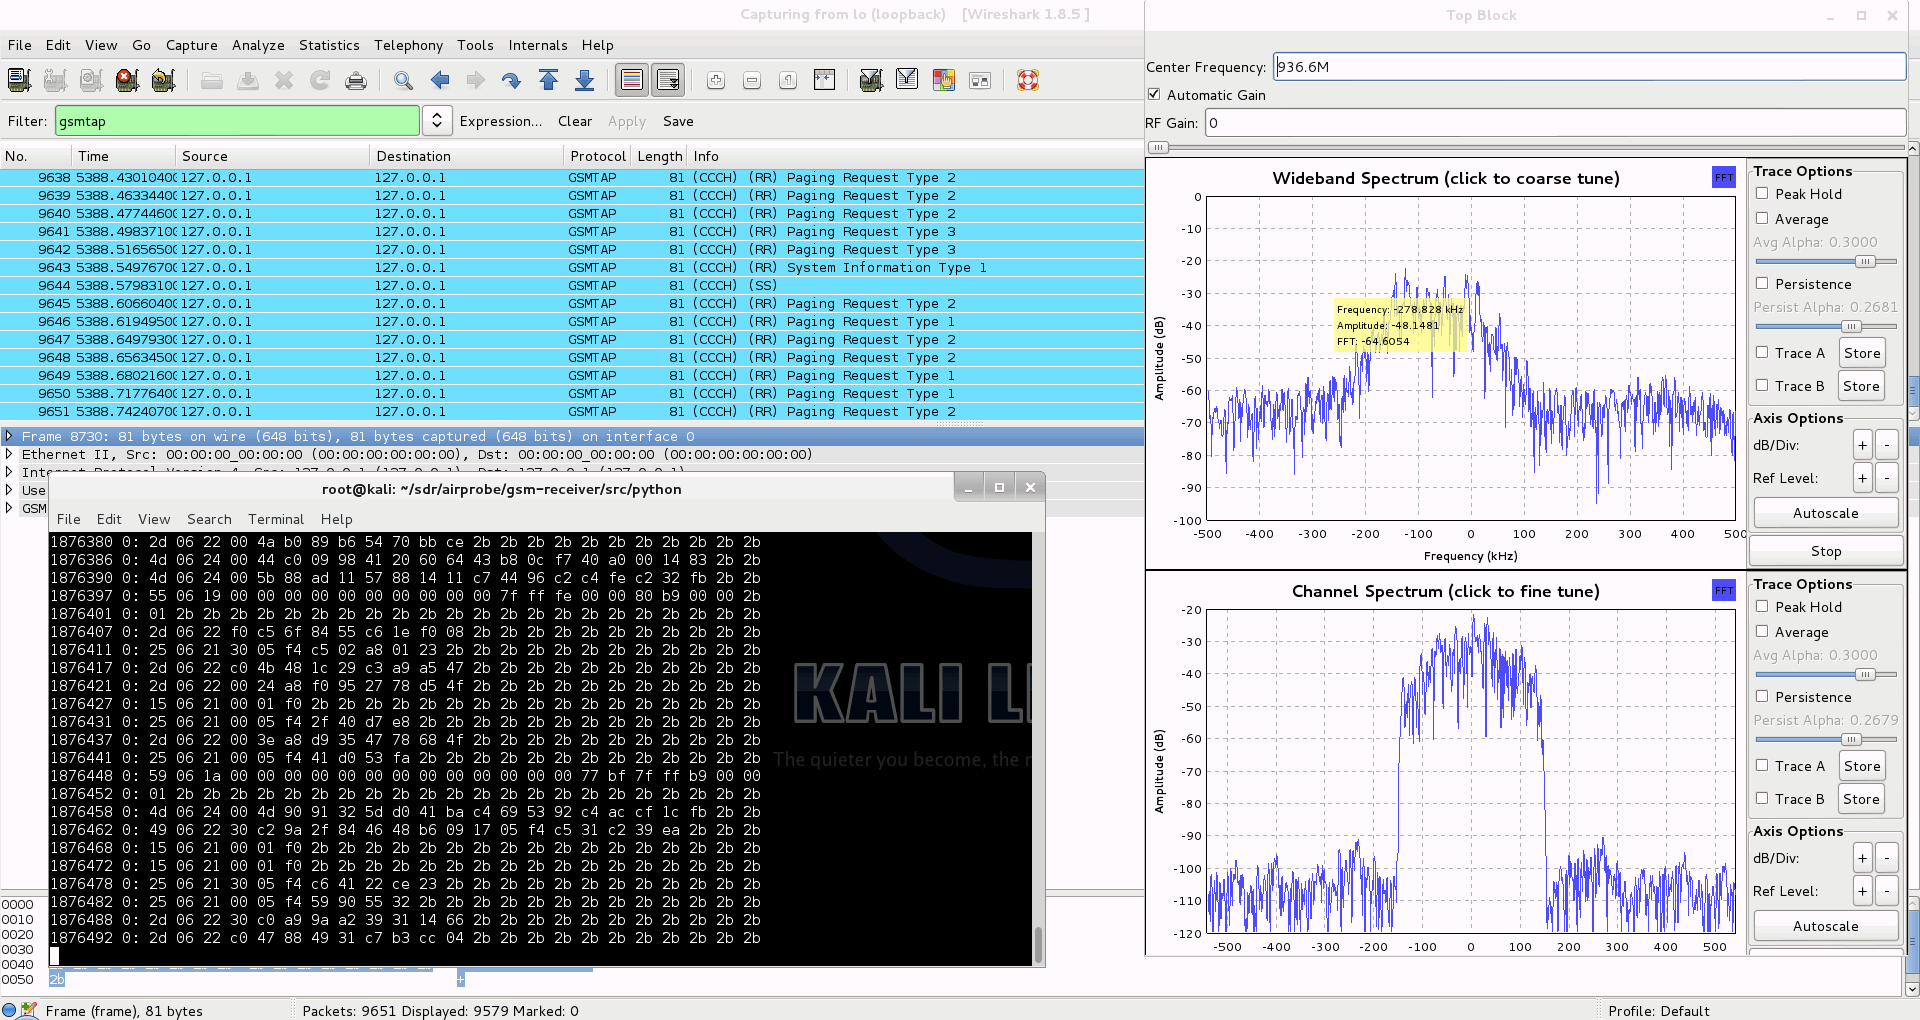
Here is a screenshot and video showing an example of the type of data you can receive. You can see the unencrypted GSM packet information. You will not be able to see any sensitive information like voice or text message data since that part is encrypted. Decryption is not covered in this tutorial.
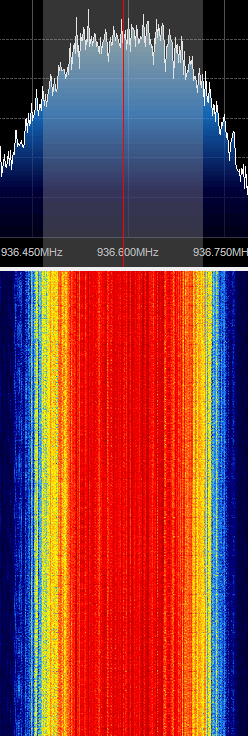
First, you will need to find out at what frequencies you have GSM signals in your area. For most of the world, the primary GSM band is 900 MHz, in the USA it starts from 850 MHz. If you have an E4000 RTL-SDR, you may also find GSM signals in the 1800 MHz band for most of the world, and 1900 MHz band for the USA. Open up SDRSharp, and scan around the 900 MHz (or 850 MHz) band for a signal that looks like the waterfall image below. This is a non-hopping GSM downlink signal. Using NFM, it will sound something like the example audio provided below. Note down the strongest GSM frequencies you can find.
The rest of the tutorial is performed in Linux and I will assume that you have basic Linux skills in using the terminal. For this tutorial I used Kali Linux in a VMWare session. You can download the VMWare image here, and the free VMWare player from here. Note that virtual box is reported not to work well with the RTL-SDR, as its USB bandwidth capabilities are poor, so VMWare player should be used.
Update: Note that the latest version of Kali Linux comes with GNU Radio pre-installed, which should allow you to skip right to the Install Airprobe stage.
Open up Kali Linux in your VMWare player and login. The default username is root, and the password is toor.
Install GNU Radio
You will need to install GNU Radio first in order to get RTL-SDR to work. An excellent video tutorial showing how to install GNU Radio in Kali Linux can be found in this video shown below. Note that I had to run apt-get update in terminal first, before running the build script, as I got 404 not found errors otherwise. You can also use March Leech’s install script to install the latest version of GNU Radio on any Linux OS. Installation instructions can be found here. I recommend installing from source to get the latest version.
Update: The new version 3.7 GNU Radio is not compatible with AirProbe. You will need to install GNU Radio 3.6. However, neeo from the comments section of this post has created a patch which makes AirProbe compatible with GNU Radio 3.7. To run it, place the patch file in your airprobe folder and then run patch -p1 < zmiana3.patch.
Install Airprobe
Airprobe is the tool that will decode the GSM signal. I used multiple tutorials to get airprobe to install. First from this University of Freiberg tutorial, I used their instructions to ensure that the needed dependencies that airprobe requires were installed.
Install Basic Dependencies
sudo apt-get –y install git-core autoconf automake libtool g++ python-dev swig libpcap0.8-dev
Update: Thanks to shyam jos from the comments section who has let us know that some extra dependencies are required when using the new Kali Linux (1.0.5) for airprobe to compile. If you’ve skipped installing GNURadio because you’re using the new Kali 1.0.5 with SDR tools preinstalled, use the following command to install the extra required dependencies.
sudo apt-get install gnuradio gnuradio-dev cmake git libboost-all-dev libusb-1.0-0 libusb-1.0-0-dev libfftw3-dev swig python-numpy
Install libosmocore
git clone git://git.osmocom.org/libosmocore.git
cd libosmocore
autoreconf –i
./configure
make
sudo make install
sudo ldconfig
Clone Airprobe
Now, I discovered that the airprobe git repository used in the University tutorial (berlin.ccc.de) was out of date, and would not compile. From this reddit thread I discovered a more up to date airprobe git repository that does compile.
Clone airprobe using the following git command.
git clone git://git.gnumonks.org/airprobe.git
Now install gsmdecode and gsm-receiver.
Install gsmdecode
cd airprobe/gsmdecode
./bootstrap
./configure
make
Install gsm-receiver
cd airprobe/gsm-receiver
./bootstrap
./configure
make
Testing Airprobe
Now, cd into to the airprobe/gsm-receiver/src/python directory. First we will test Airprobe on a sample GSM cfile. Get the sample cfile which I found from this tutorial by typing into terminal.
cd airprobe/gsm-receiver/src/python wget https://svn.berlin.ccc.de/projects/airprobe/raw-attachment/wiki/DeModulation/capture_941.8M_112.cfile
Note: The tutorial and cfile link is sometimes dead. I have mirrored the cfile on megaupload at this link. Place the cfile in the airprobe/gsm-receiver/src/python folder.
Now open wireshark, by typing wireshark into a second terminal window. Wireshark is already installed in Kali Linux, but may not be in other Linux distributions. Since Airprobe dumps data to a UDP port, we must set Wireshark to listen to this. Under Start in Wireshark, first set the capture interface to lo (loopback), and then press Start. Then in the filter box, type in gsmtap. This will ensure only airprobe GSM data is displayed.
Back in the first terminal that is in the python directory, type in
./go.sh capture_941.8M_112.cfile
If everything installed correctly, you should now be able to see the sample GSM data in wireshark.
Receive a Live Channel
To decode a live channel using RTL-SDR type in terminal
./gsm_receive_rtl.py -s 1e6
A new window will pop up. Tune to a known non-hopping GSM channel that you found earlier using SDRSharp by entering the Center Frequency. Then, click in the middle of the GSM channel in the Wideband Spectrum window. Within a few seconds some GSM data should begin to show constantly in wireshark. Type ./gsm_receive_rtl.py -h for information on more options. The -s flag is used here to set the sample rate to 1.0 MSPS, which seems to work much better than the default of 1.8 MSPS as it seems that there should be only one GSM peak in the wideband spectrum window.
Capturing a cfile with the RTL-SDR (Added: 13/06/13)
I wasn’t able to find a way to use airprobe to capture my own cfile. I did find a way to capture one using ./rtl_sdr and GNU Radio however.
First save a rtl_sdr .bin data file using where -s is the sample rate, -f is the GSM signal frequency and -g is the gain setting. (rtl_sdr is stored in ‘gnuradio-src/rtl-sdr/src’)
./rtl_sdr /tmp/rtl_sdr_capture.bin -s 1.0e6 -f 936.6e6 -g 44.5
Next, download this GNU Radio Companion (GRC) flow graph (scroll all the way down for the link), which will convert the rtl_sdr .bin file into a .cfile. Set the file source to the capture.bin file, and set the file output for a file called capture.cfile which should be located in the ‘airprobe/gsm-receiver/src/python’ folder. Also, make sure that ‘Repeat’ in the File Source block is set to ‘No’.
Now execute the GRC flow graph by clicking on the icon that looks like grey cogs. This will create the capture.cfile. The flow chart will not stop by itself when it’s done, so once the file has been written press the red X icon in GRC to stop the flow chart running.
The capture.cfile can now be used in airprobe. However, to use this cfile, I found that I had to use ./gsm_receive.py, rather than ./go.sh as a custom decimation rate is required. I’m not sure why, but a decimation rate of 64 worked for me, which is set with the -d flag.
./gsm_receive.py -I rtl_sdr_capture.cfile -d 64
Going Further
I have not been able to decode encrypted GSM data myself, but if you are interested in researching this further, here are some useful links. Disclaimer: Only decrypt signals you are legally allowed to (such as from your own cell phone) to avoid breaching privacy.
A Guide by Security Research Labs
GSM Decoding Tutorial by the University of Norwegian Science and Technology
A5 Wiki
A good lecture on this topic is shown below.
 If you enjoyed this tutorial you may like our ebook available on Amazon. The Hobbyist’s Guide to the RTL-SDR: Really Cheap Software Defined radio. |
The post RTL-SDR Tutorial: Analyzing GSM with Airprobe and Wireshark appeared first on rtl-sdr.com.


